Comptia Security+.
This article follows on from Setup Remote access on a Cisco Switch and Configure SSH on a Cisco Switch.
In the previous articles I discussed connecting a PC to a Cisco switch using a console cable in order to configure a remote connection.
In this article we will setup an SSH connection on the switch instead of a Telnet connection. SSH is more secure than Telnet as all data is encrypted.
Lets go over what we did so far.
Console cable
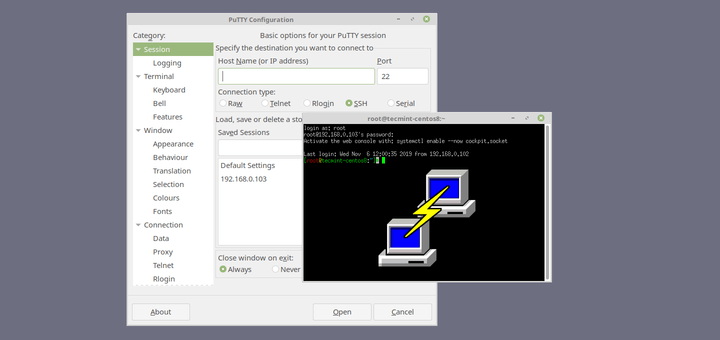
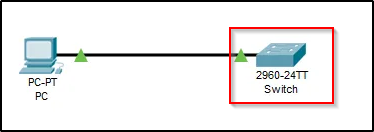
First and foremost we need to connect to the switch using a console cable.

Access the Switches Command Line Interface (CLI) using a Terminal Emulator such as Putty.
Configuration common to Telnet and SSH
After accessing the switch’s CLI we configured an Enable Mode password to stop any unauthorized access to the switch. In this case we set the password to “blueocean”

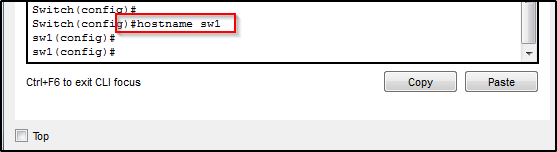
Change the name of the switch. This is a good habit to get into. It is also required for SSH access.
VPN – Management Interface
We then created a Management interface by configuring IP address information on Virtual LAN 1. VLAN1 consists of all the ports on the switch. Check out VLans the basics if you want to learn more about Vlans.
The VLAN needs IP address information in order to access the switch remotely.

Username and Password
Next we configured our individual username and password. This is stored locally on the switch and is used for remote login using Telnet and SSH.

Finally we configured our Telnet commands completing our basic remote access setup.
At this point Telnet is setup on the switch allowing us the ability to access the switch remotely.
SSH Specific
Lets continue where we left off. We only need to add a few more commands for SSH to work.
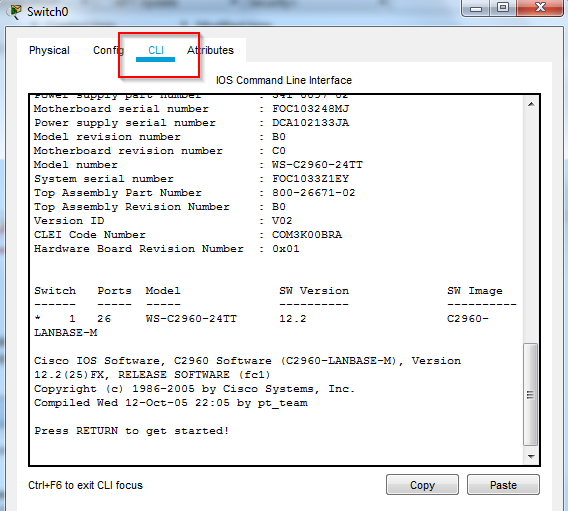
Open the CLI by directly clicking on it in Packet Tracer
and selecting the CLI.
Transport Input
This command can be left out of the configuration, as was the case when we configured Telnet in the previous article. If its left out then it defaults to “transport input all”; allowing connections from both Telnet and SSH.
I will configure it here to only allow SSH connections. I’m doing this for two reasons. Firstly to show you the configuration and secondly because only allowing SSH connections will secure the switch by preventing Telnet connections. As I mentioned Telnet is not secure.
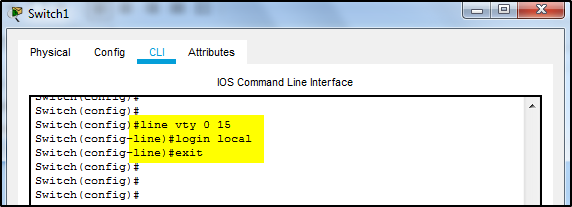
Line vty
To configure the “transport input” command, access the line vty 0 15 sub command. This was previously setup for the Telnet connection. Then add the command “transport input ssh”.
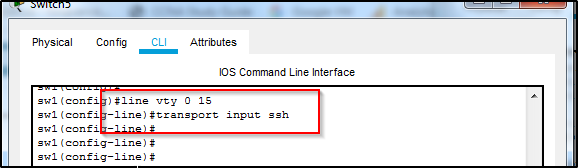
Exit out of the line vty sub-command.
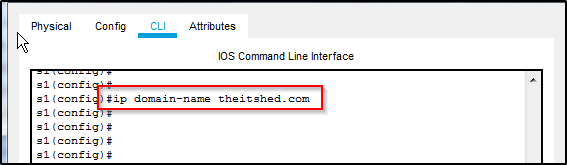
Domain Name
Add the command “ip domain-name example.com”
example.com should be your company name, but realistically it can be anything. I named it “theitshed” after my website.
Encryption
SSH requires an encryption key in order to be secure. Type the command “crypto key generate rsa”. You will be prompted for the amount of bits required for the key. The more bits the more secure the key. I just pressed enter to accept the default 512.

And that it your done!!
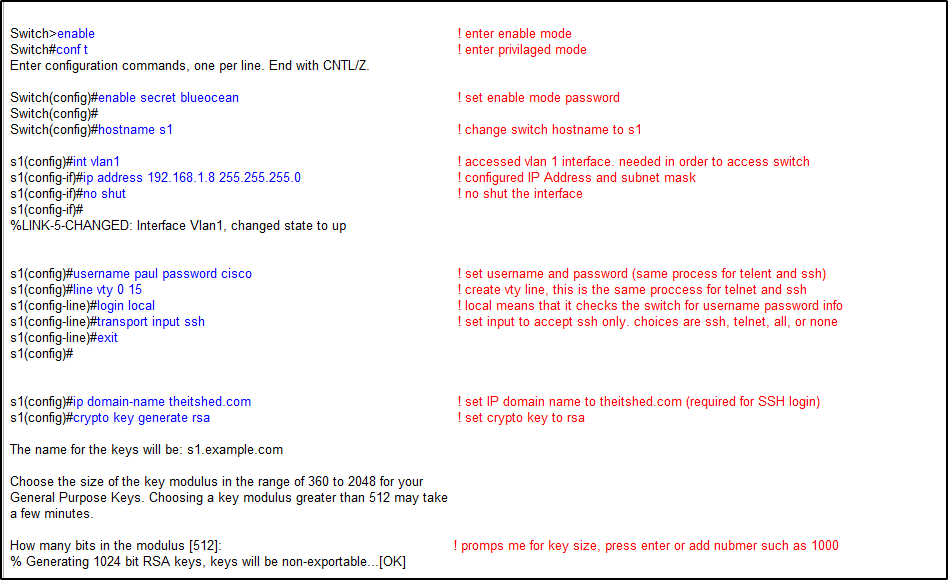
Complete SSH configuration
The complete SSH configuration is listed below. The writing in blue is the commands I entered on the switch. The red is a brief explanation of the commands.
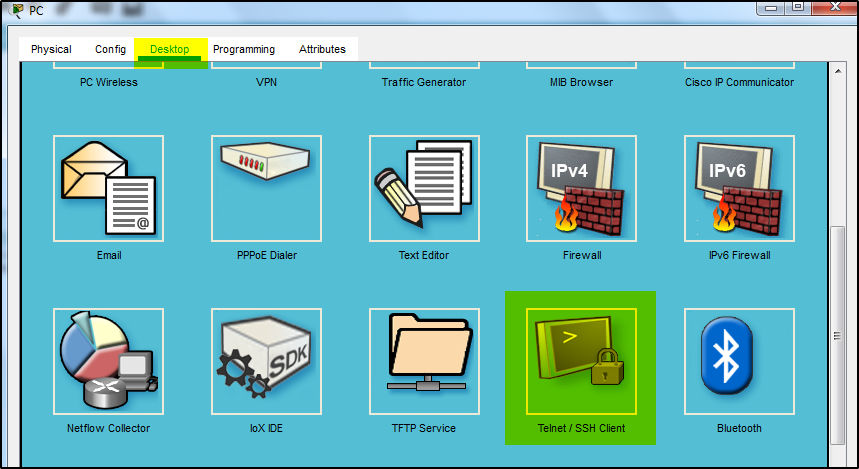
Now that SSH is configured, lets log in..
Open a Terminal Emulator; on Packet Tracer, click on the PC, Desktop and Telnet/SSH client
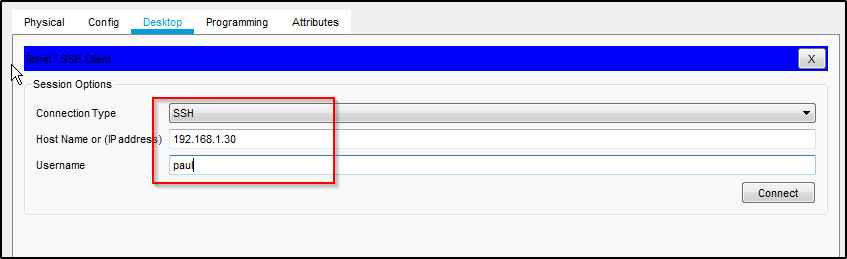
Type your IP address and username then click connect.
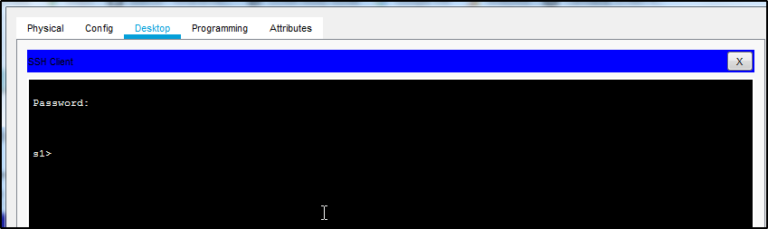
You are now connected to the Switch via SSH!!
Summary
This concludes my articles on remote access to a Cisco switch. I began this series by looking at initially setting up Remote access to a Cisco Switch and then moved on to Configuring Telnet on a Cisco Switch.
SSH is a more secure alternative to Telnet as SSH encrypts all data including usernames and passwords. Setting up SSH is a simple process and only require a few more steps than Telnet.
If you haven’t done so already why not download a copy of Packet Tracer and get practicing??
Comptia Security+.
Cisco CCNA.

Diploma Information Technology.